Why Start with Black and White?
Before diving into color, painting in black and white is one of the most effective exercises for beginners.
It sharpens your observation skills and builds a solid foundation in understanding value—the lightness or darkness of tones—which is essential for creating depth, form, and realism in art.
Recommended further reading:
- Value Lesson 1: What is Value in Art?
- Value Lesson 2: Value Scales
- Video Demo: How to Create a Value Scale
Overview
Value is the backbone of successful painting. By focusing on value before introducing color, you learn to simplify what you see into relationships of light and dark, strengthening your ability to render form and space.
Removing color eliminates distractions, allowing you to:
- Develop keen observation skills
- Simplify complex scenes into clear value shapes
- Build confidence in creating convincing volume and depth
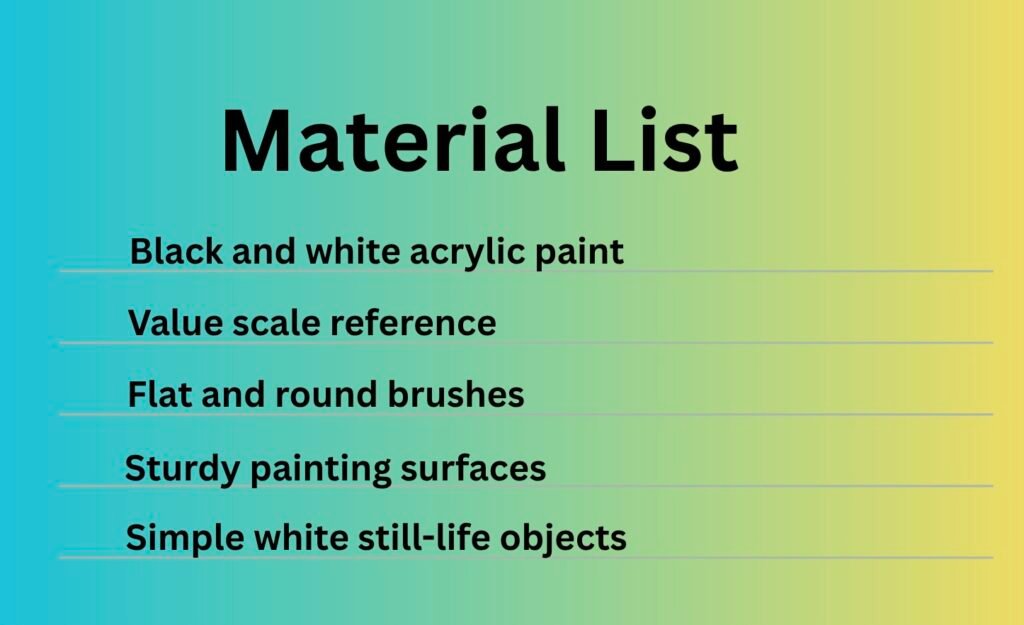
*Watercolor paper or Bristol board is fine.
Method
Follow along with your own reference. Create with me!
Step 1: Create a Value Scale
A value scale is a tool that helps you see and mix a range of values from pure white to pure black. Create one (any of 6 to 10 steps) following this video demo.


How to make a value scale:
- Paint the lightest value (white) on one end and the darkest value (black) on the other.
- Gradually mix and paint the intermediate grays, aiming for even transitions between each step.
- Number the steps–white as 1 and the highest number for black.
- Use your value scale as a reference throughout your painting process.
Tip: Start with the lightest color and add small amounts of black to create each step, as it’s easier to darken than to lighten your mixtures.
Step 2: Set up Simple White Objects or Use Black-and-White References

If your still life is colorful, convert your reference image to grayscale—either by printing or digitally adjusting it. Or use a simple white still life, so you don’t need to convert the image.
➤ Beginner Tip:Start with Planes, Not Curves
Start with flat planes like:
Folded paper setups
Boxes (even stacked)
Origami-style forms

These offer clear, distinct value areas, making it easier to study light direction, contrast, and form.

Students’ Work
These have clear, distinct value planes than round objects. This makes it easier to see and paint distinct values before progressing to more complex or rounded forms like eggs or fruit.
Step 3: Map out Value Zones
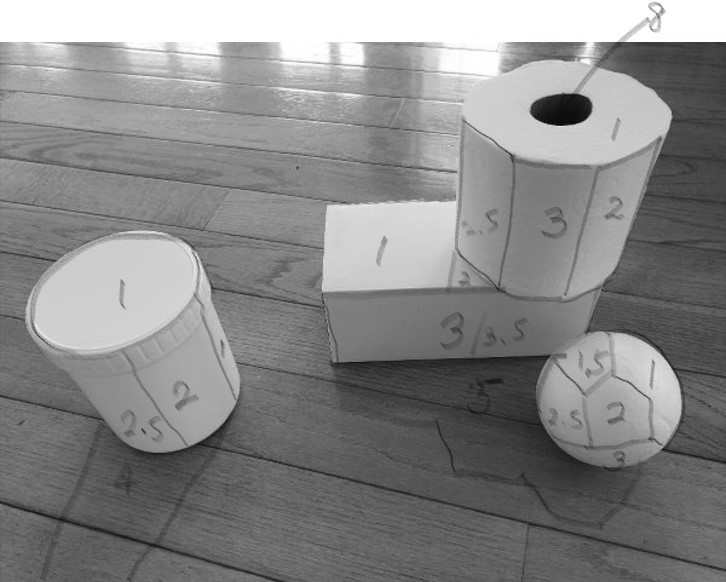
Create a value contour map on your painting surface.
- Identify and outline the major value areas using your value scale for comparison.
- Number the values in each area to match your scale.
- You can keep boundaries distinct or blend them as you paint, depending on the effect you want.

I am demonstrating only this section.
The Rest Painting Steps:
Once you’ve mapped out the value zones, the rest of the painting process follows these core stages. You don’t need to over-focus on perfection—just stay attentive to light, shape, and transition.
Step 4: Block in Major Shapes & Paint Corners


Step 5: Adjust Values and Treat Edges & Boundaries


Take a Break for Helpful Tips:


Back to Lessons:


Click the image below to watch the full step‑by‑step demo on YouTube.