

Train Your Eye: Drawing Better with Negative Shapes
How Negative Shapes Transform Your Drawing
If your drawings often feel inaccurate—despite careful observation and slow, deliberate effort—the issue may not be technical skill. More often, it stems from how we see.
Many drawing inaccuracies—such as distortion and awkward proportions—come from focusing only on the object itself.
So what holds the key to solving this problem?
One of the most effective ways to improve drawing accuracy is to shift attention away from objects and toward the negative shapes that surround them.
In this lesson, we’ll use negative shapes to train your eye so your accuracy improves dramatically.
Before we move into practical application, let’s briefly revisit what positive and negative shapes are.
Quick Review: Positive vs. Negative Shapes
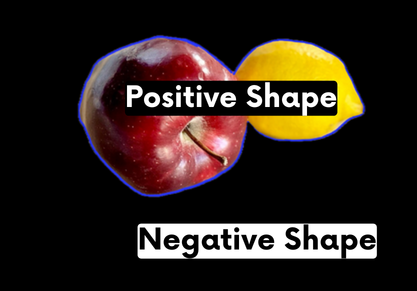
Positive Shapes
Positive shapes are the main subjects, forms, or objects in your artwork.
They are what we usually identify first: a tree in a landscape, a figure in a portrait, or a vase in a still life.
Negative Shapes (Negative Space)
Negative shapes are the spaces around, between, and within those main subjects.
They are not merely “background.” Negative shapes are active areas that define the positive shapes.
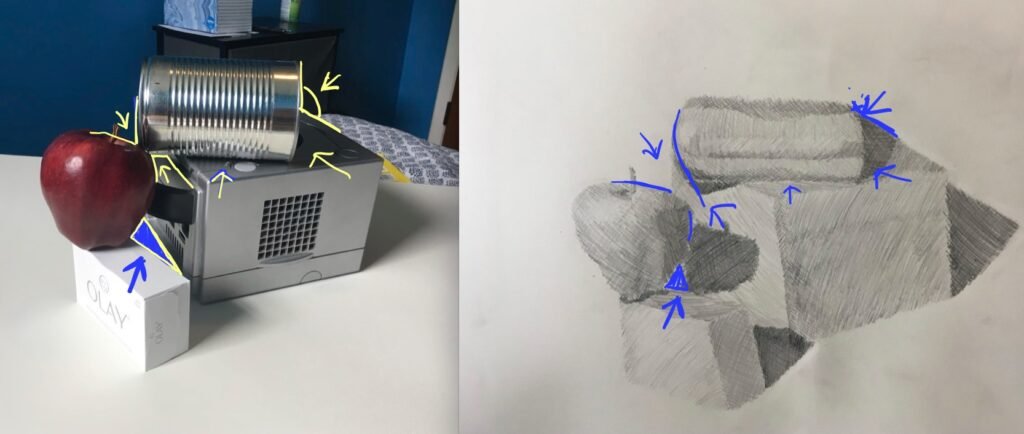
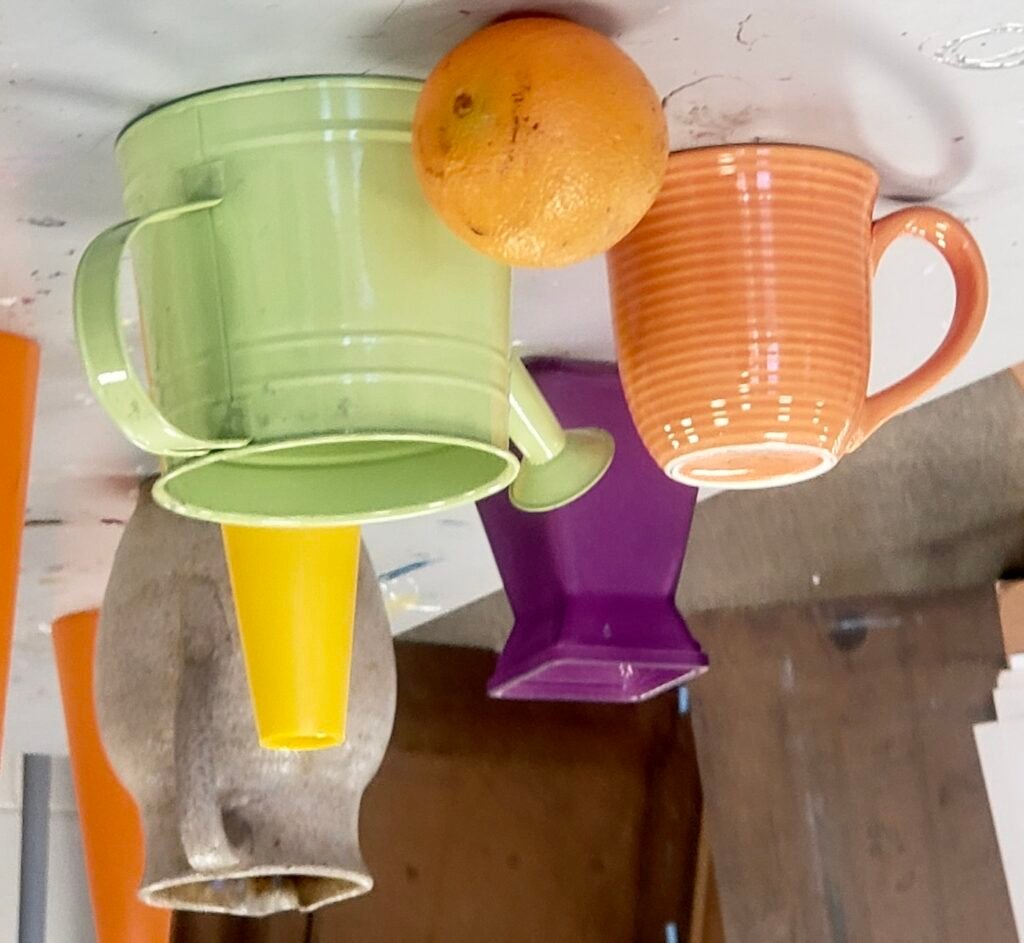
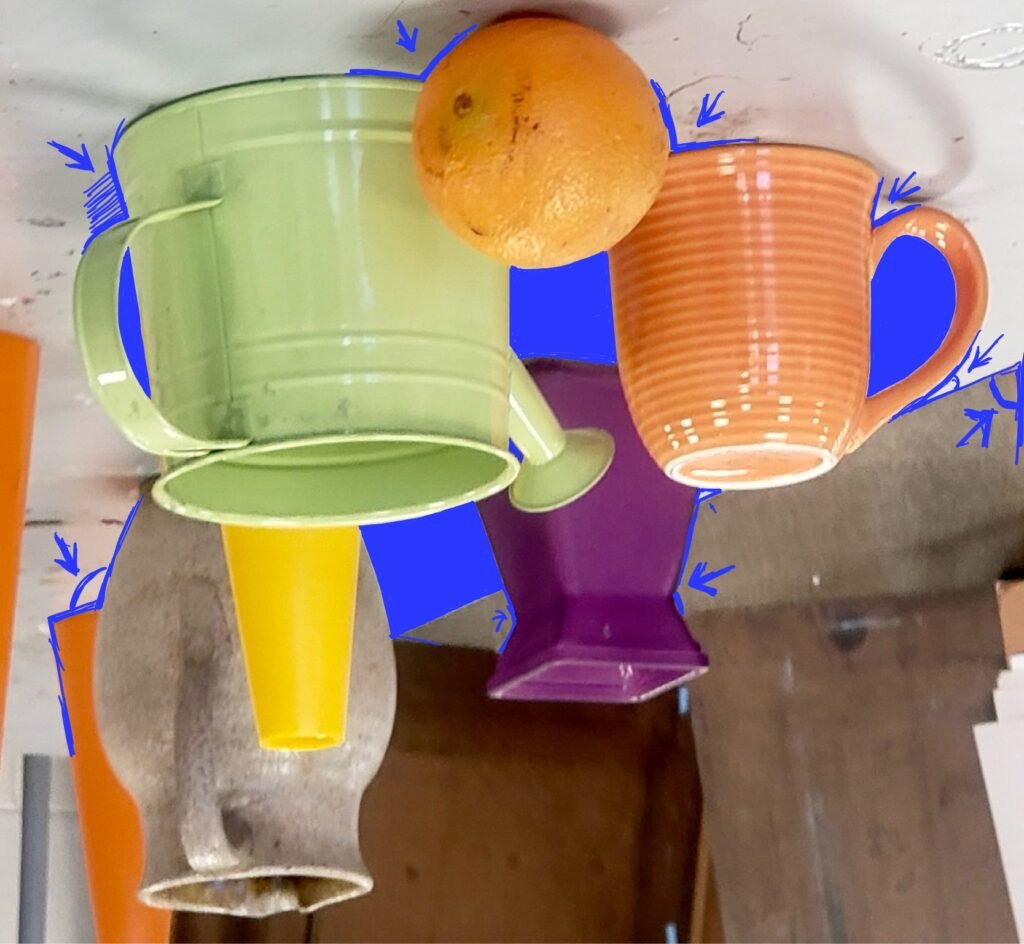
When multiple objects sit close together, treat them as a single positive shape and ignore the boundaries or outlines between them—the focus is on the negative shapes around and between the entire group.
If you’d like a fuller explanation of these concepts, I’ve covered them in an earlier lesson, Positive and Negative Shapes: Essential Guide. That post focuses primarily on how positive and negative shapes work together in composition.
Today we’ll narrow in on using negative shapes specifically to improve drawing accuracy.
Some ideas may overlap with earlier discussions, but this repetition is necessary. The concept of positive and negative shapes is often abstract and far more complex than the simple definitions suggest.
One Habit That Can Change Your Drawing
In this lesson, I want to focus on one essential practice—something anyone can apply immediately, regardless of skill level.
Train your eye to see negative shapes.
When you truly focus on negative shapes, accuracy improves almost automatically. Proportions, angles, and spatial relationships begin to fall into place because you are seeing more truthfully.
Think of it as training both your perception and your drawing muscles at the same time.
Key Techniques for Using Negative Shapes
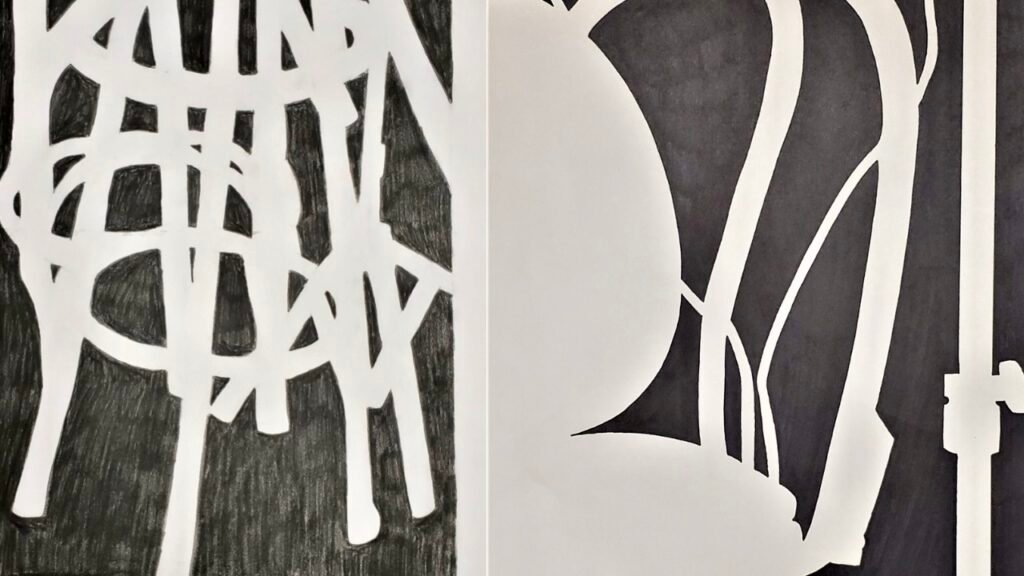
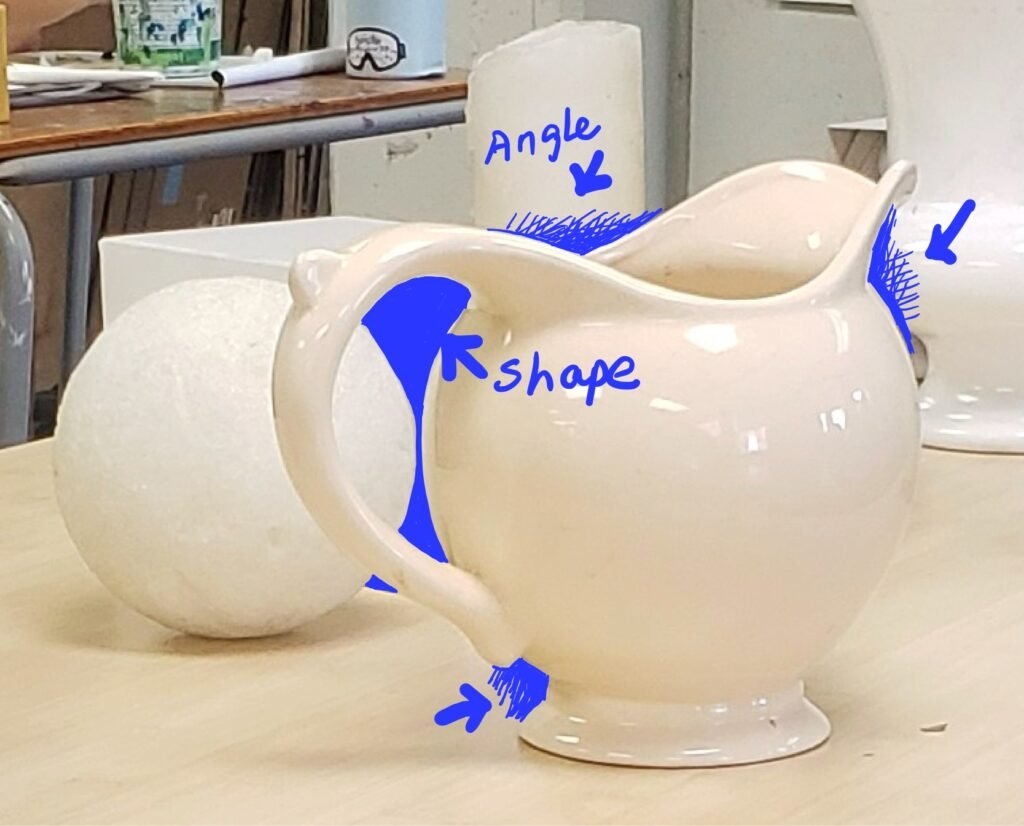
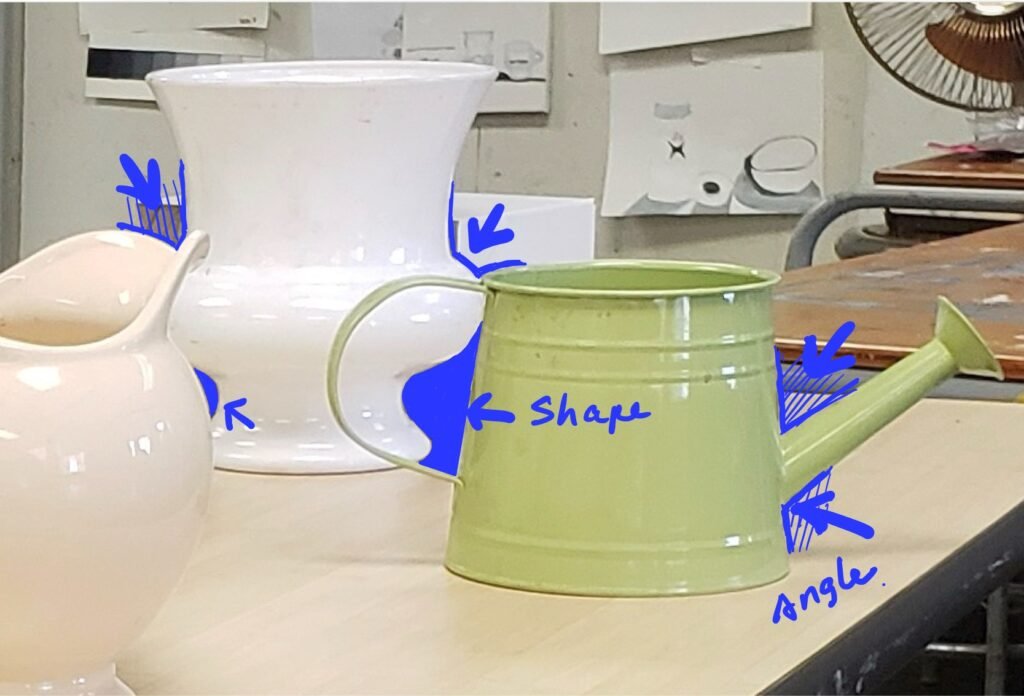
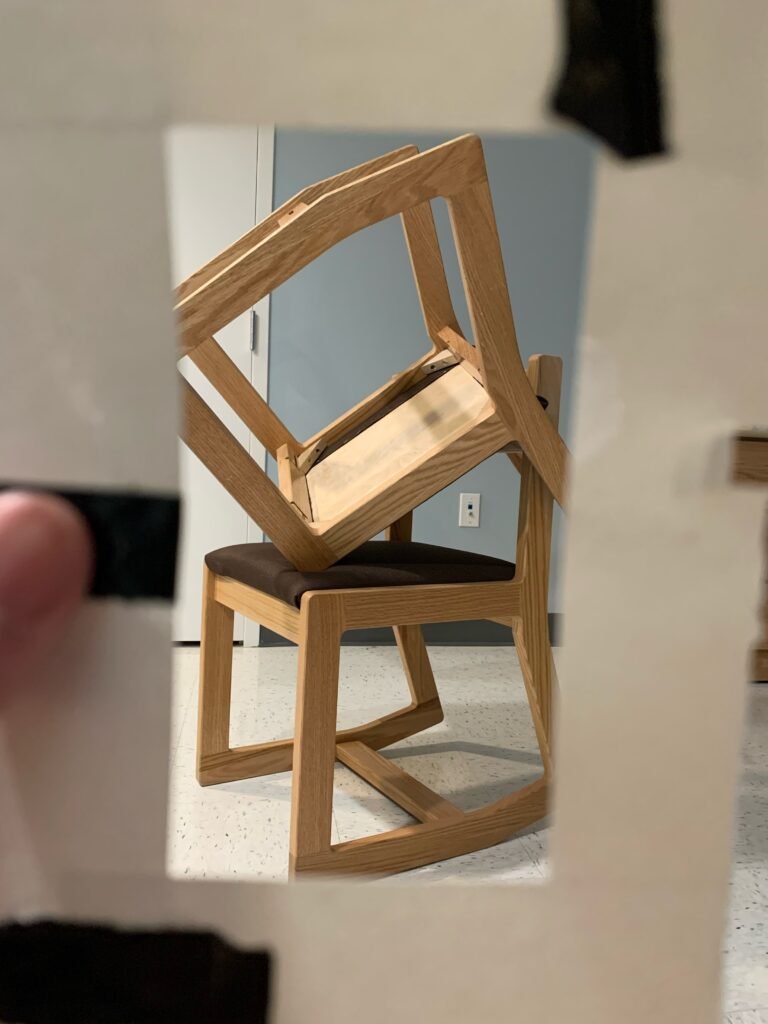
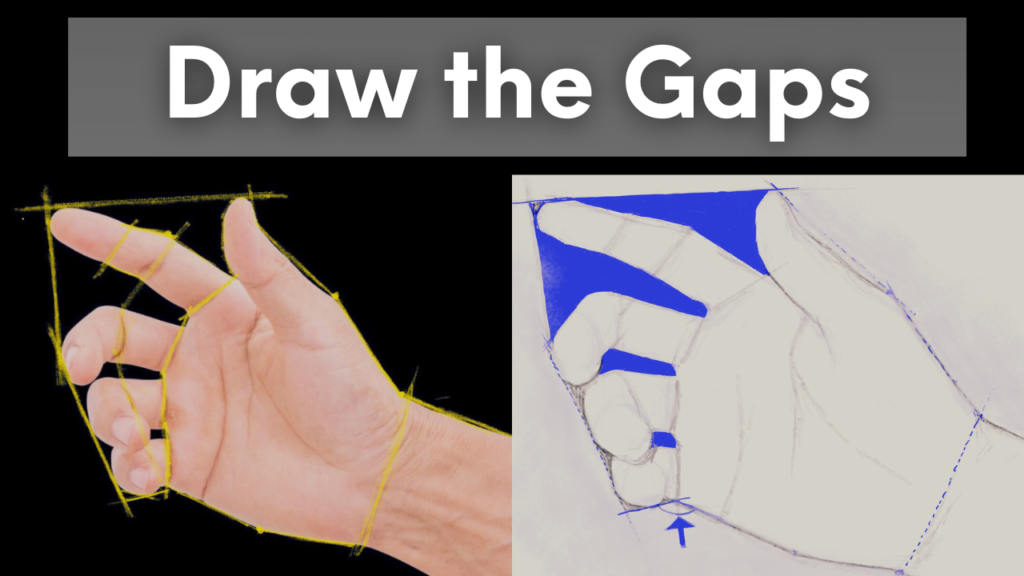
1. Outline the Gaps, Not the Objects
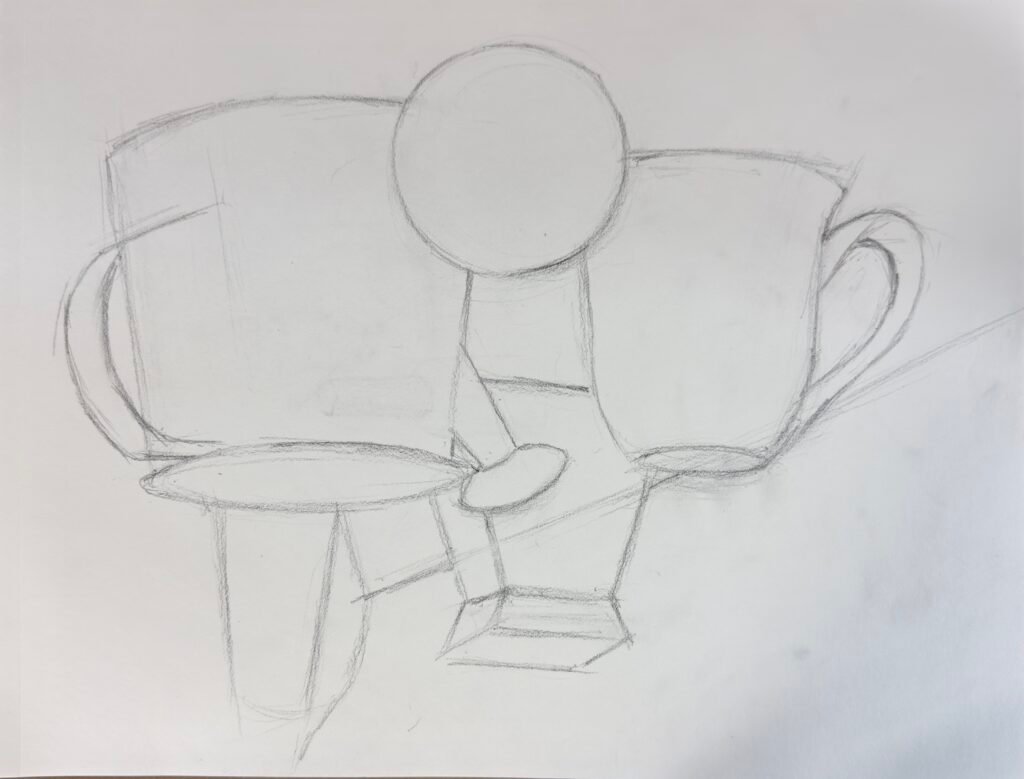
Instead of drawing the object itself—such as a chair leg—draw the shape of the air around it. Look for triangles, wedges, rectangles, and strange irregular shapes between and around the forms. Draw those shapes as if they are solid objects.
These surrounding shapes are often clearer and more specific than the object’s contour. When you draw the gaps accurately, the object emerges on its own.
2. Use a Viewfinder
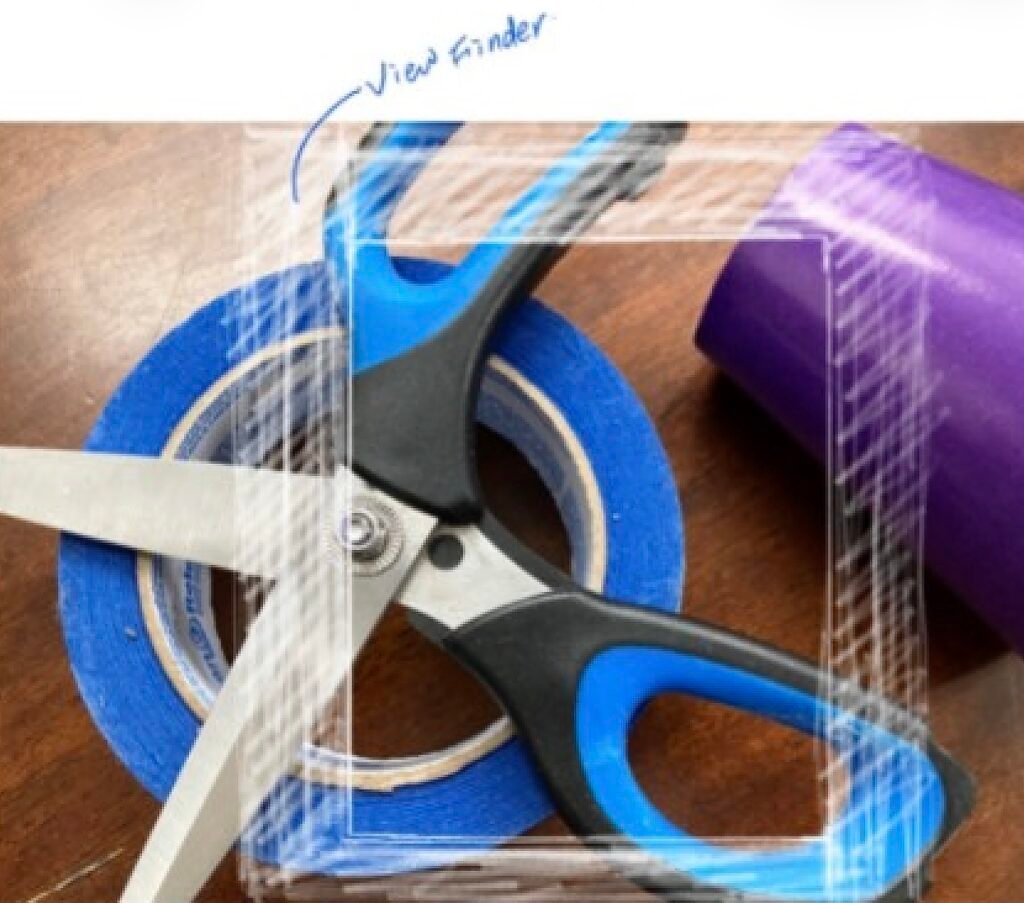
A simple viewfinder helps frame both positive and negative shapes.
- Hold it up and frame your subject so you can clearly see the shapes between your subject and the edges of the frame.
- Without a boundary, the negative shapes in open space are vague; with a frame, they become clear, specific forms.
- The edges of the viewfinder give negative shapes a clear beginning and end, making them easier to see, measure, and compare.
3. Focus on Relationships, Not Details
Negative shapes are excellent tools for judging:
- Distance
- Angles
- Proportions
Accuracy lives in relationships, not just in the outline of an object. Negative shapes give you those relationships in clear, measurable forms.
I’ll discuss this topic in more detail in a future lesson on sighting and measuring.
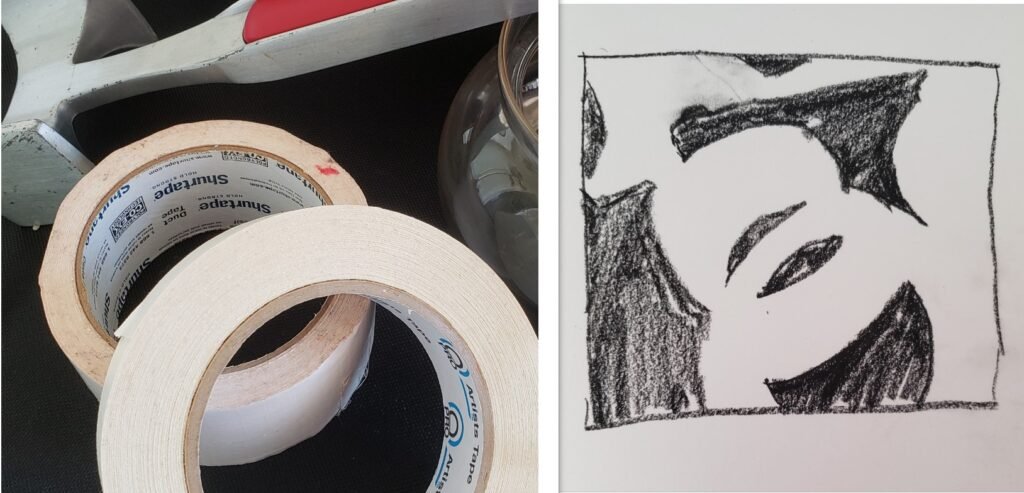
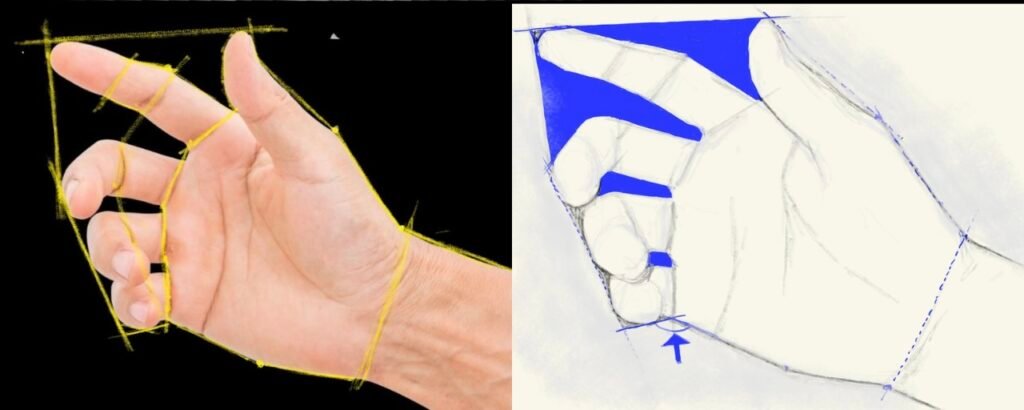
4. Turn the Reference or Object Upside Down
Many drawing errors come from working from the idea or representation of an object rather than from honest observation.
Don’t hesitate to turn a reference—or even your entire setup—upside down. It is one of the simplest and most effective ways to break this habit.
By changing the orientation, familiar identities dissolve. The subject no longer reads as an object, but as a collection of abstract shapes, angles, and relationships. This shift forces the brain to observe more carefully instead of relying on representation.
As a result:
- The object loses its familiar identity (“eye,” “hand,” “chair”). It’s forced to see abstract shapes instead.
- Forget about what the objects are. Just draw the shapes you see.
- Attention shifts from preconceived ideas to seeing (direct observation).
5. Simplify and Block In First
Squint at your subject to simplify what you see. Block in the largest shapes first. Focus on the negative shapes between and around the main forms.
When the major negative shapes are accurate, everything else becomes easier to adjust. Smaller shapes and details can be refined later.
Over time, as you consistently practice this way of seeing, both your eye and your hand will develop together.
Negative Space vs. Contour Drawing
Contour drawing focuses on the edges of the object.
Negative space drawing focuses on the spaces between objects.
A useful contrast:
- Contour drawing: “Follow the object.”
- Negative space drawing: “Map the gaps.”
Negative space is especially effective when drawings feel inaccurate despite careful effort. Switching to negative space can unlock their perception if you feel stuck in contour drawing.
Perception Before Representation
The moment we think, “This is a vase,” the drawing is already compromised. Recognition triggers assumptions, and what follows is often a representation of a vase—not a drawing based on what is actually seen. Negative shapes delay that recognition long enough for perception to take over.
This shift—from representation to observation—is one of the most important milestones in learning to draw.
A Quiet Reminder
Learning to see negative shapes clearly takes time. It requires patience and repeated practice. But once this way of seeing becomes familiar, it changes how you approach drawing entirely—not just accuracy, but confidence.
You are, in a very real sense, training both—your perception and your drawing muscles at the same time.
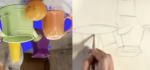
Please click the image for my YouTube video.


[…] For a deeper exercise on training this view, try this focused tutorial: train your eye with negative shapes. […]