Essential Drawing Materials for Beginners: A Practical Supply List
Drawing does not require a large or expensive collection of art supplies. In fact, starting with a small, well-chosen set is often the best way to learn.
With a few graphite pencils, suitable paper, and a handful of simple tools, you can practice line, shape, value, proportion, and form—the core skills behind drawing.
This guide explains the essential materials for beginning with graphite: what to buy, what each tool does, and how to choose a setup that suits your budget and level of commitment.
This is the second installment in my Essential Budget-Conscious Art Materials series, following my watercolor-paints guide.
Before You Start
This post focuses on three main areas:
1. Graphite pencils
2. Drawing paper
3. Erasers and key accessories
At the end, I share three starter kits, from a bare-bones setup under $20 to a more complete option for beginners ready to practice regularly.
You do not need to buy everything at once. Begin with the simplest kit that feels realistic for you, use it often, and add materials gradually as your practice grows.
I will cover charcoal, ink, and more experimental drawing tools in separate posts.
Affiliate Disclosure
Some product links in this post may be affiliate links. If you purchase through these links, I may earn a small commission at no additional cost to you. I recommend only materials that I have used, tested, or consider genuinely useful.
1. Graphite Pencils: The Foundation
Graphite pencils are among the most fundamental and versatile drawing tools.
You do not need a full set of twelve pencils to begin. A small, carefully selected range is enough for most beginner exercises.
How the grading system works:
In my demonstration, I compared grades from 2H to 6B to show how hardness affects line, value, and texture.
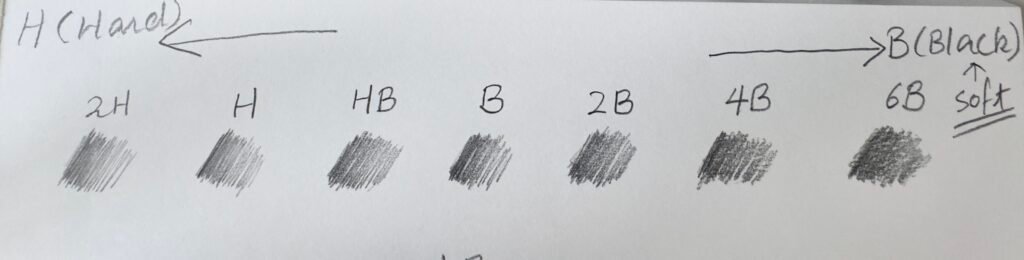
On pencils, H stands for Hardness and B stands for Blackness. These letters describe how hard or soft the core is.
- H pencils (Hard) — produce lighter, finer marks and resist smudging. Good for light construction lines, guidelines, and initial sketching.
- B pencils (Soft) — produce darker, richer marks and blend more easily. Good for shadows, bold lines, and expressive shading.
- HB — sits in the middle and works as a general-purpose pencil.
The numbers next to the letters indicate the degree of hardness or softness. For example, a 2H is harder and lighter than an H, while a 6B is softer and darker than a 2B. In most common pencil ranges, 9H is at the hard, light end of the scale, while 9B is at the soft, dark end.
Here is the example:
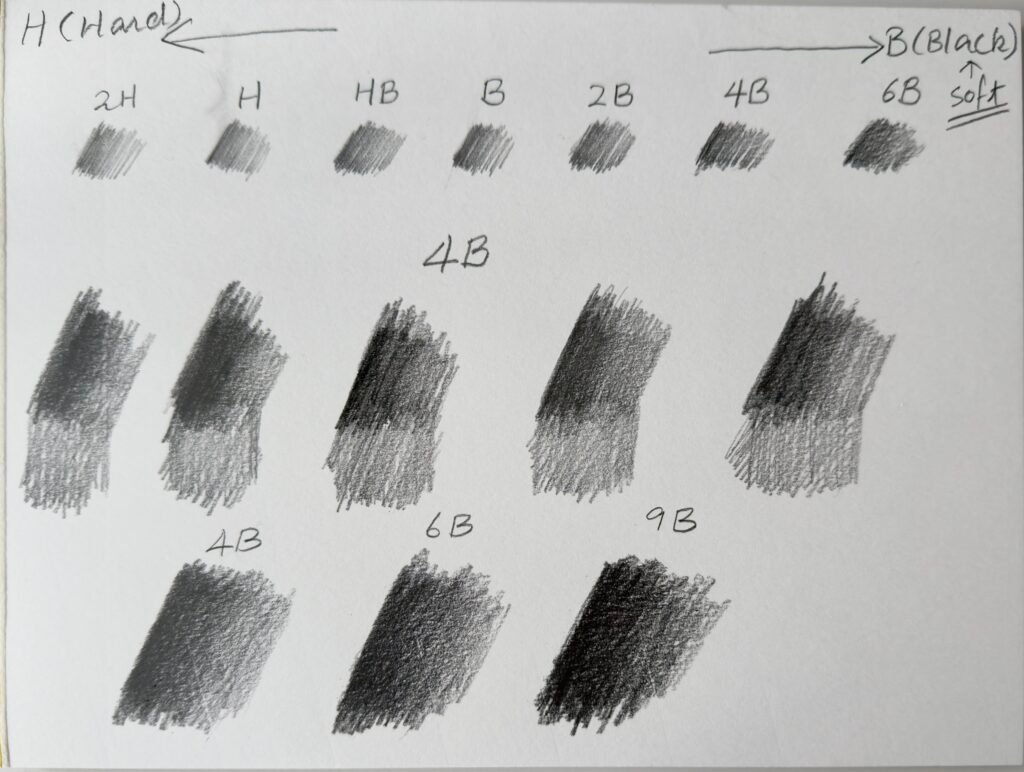
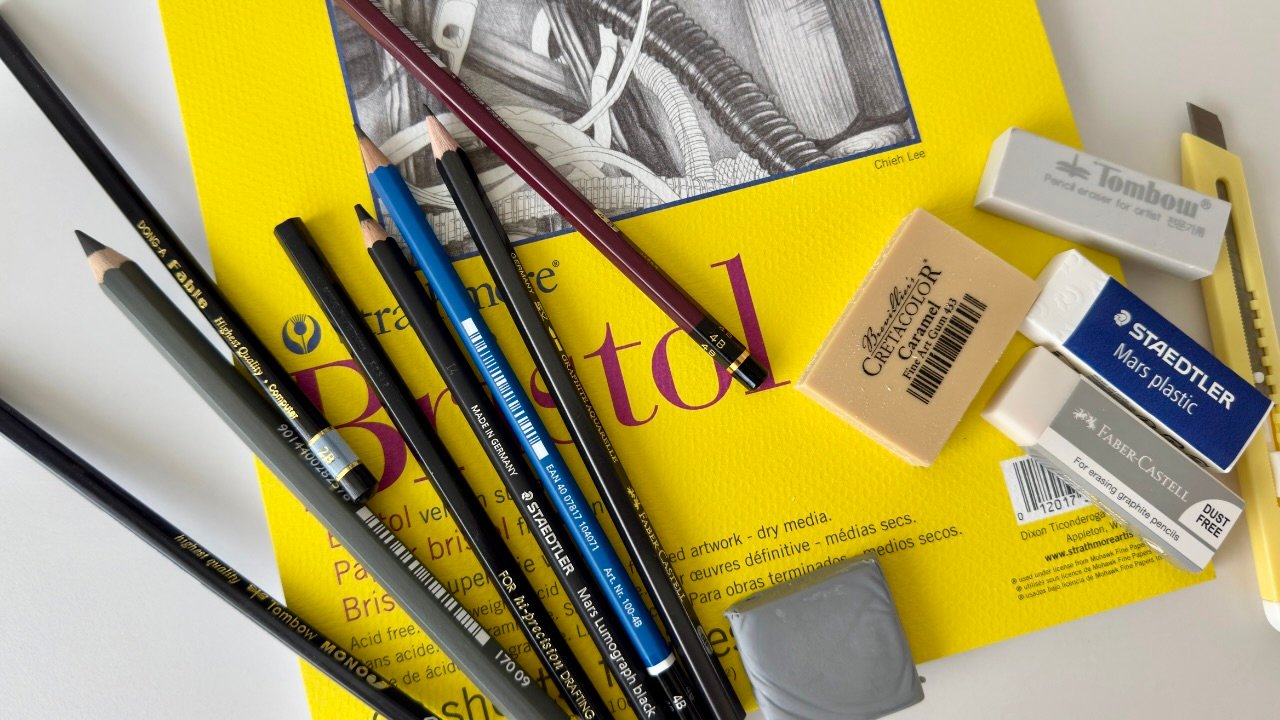
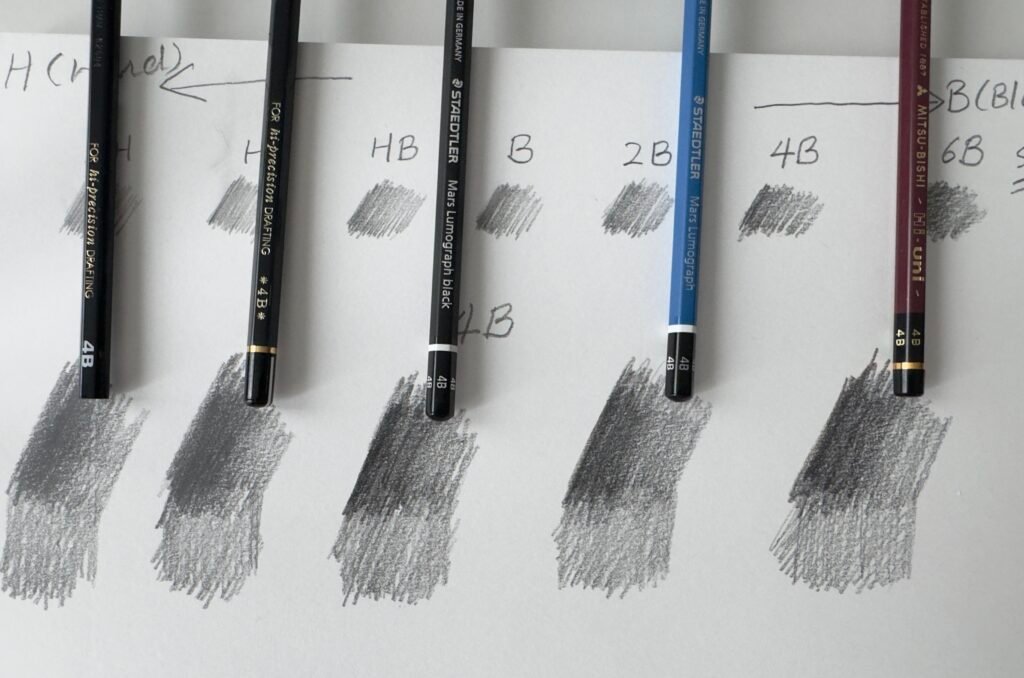
I tested several brands in the same 4B grade to make the comparison as fair as possible.
Recommended Ranges:
Option 1: One Pencil Approach
Choose: 4B
A single 4B pencil gives beginners a useful balance between line and shading. With light pressure, it can make faint layout lines; with gradually heavier pressure and layering, it can produce mid-tones and strong shadows without needing to switch tools.
Option 2: Essential 3-4 Pencil Kit
Choose three or four pencils from roughly 2H to 6B. Your ideal combination depends on the kind of marks you enjoy making.
- For a neat, precise style, try: 2H, B, 2B (or H, B, 2B)
- For a slightly darker, more expressive style, try: HB, 2B, 6B (or 2B, 4B, 6B)
My preference leans toward the darker options because I can always use lighter pressure with a soft pencil, but a hard pencil cannot easily make a deep dark value.
A useful role for each grade:
2H or H: light, precise structural layout sketches and fine details.
HB or B: mid-tone shading, texture, and general line work.
4B: dark, smooth shadows, and foundational values.
6B or 8B: rich, dramatic darks (the “pop” factor in a drawing).
Option 3: Full Essential Beginner set
A simple, functional six‑pencil range:
2H, HB, B, 2B, 4B, and 6B
This is enough for line practice, value scales, contour drawing, still-life studies, and basic shading. You can expand lighter or darker later, but this range focuses on essentials rather than every possible grade.
Pencil Brand Characteristics
Even at the same grade, pencils do not behave identically across brands. Each manufacturer uses its own graphite blend, clay content, binders, and production methods. As a result, one 4B may feel darker, smoother, firmer, shinier, or easier to erase than another.
For my comparison, I tested several widely available pencils in 4B. These are not the only excellent pencils available, but they offer useful examples of how brand character can affect drawing experience.
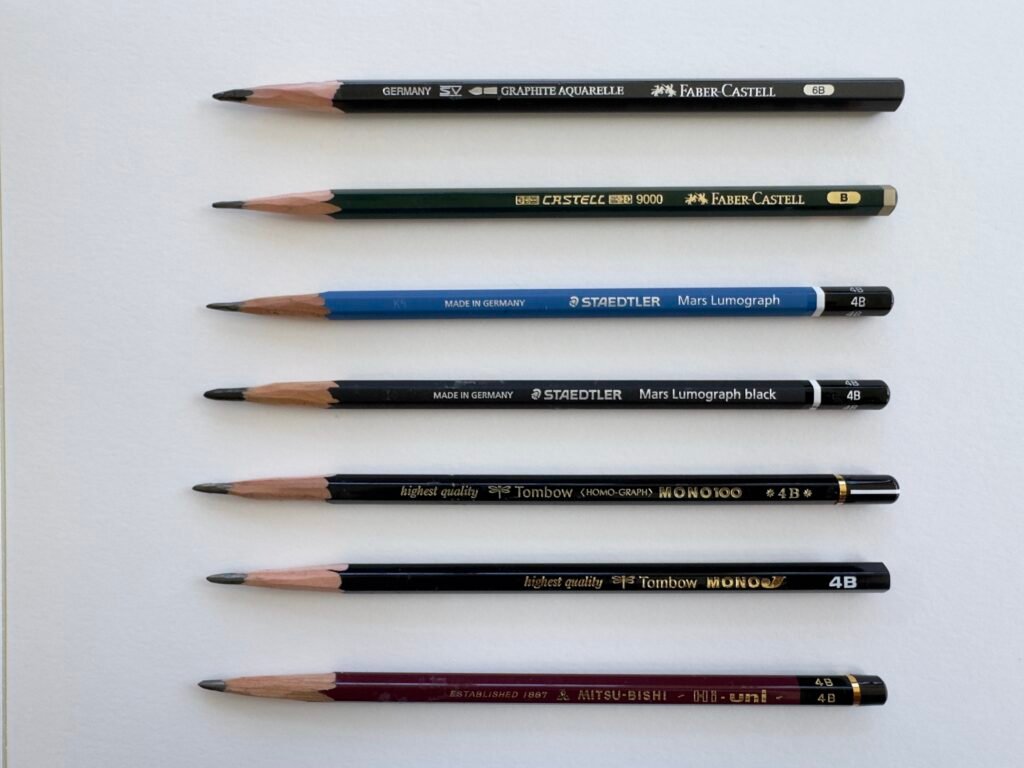
Staedtler Mars Lumograph
Staedtler’s pencil-making history is rooted in 19th-century Nuremberg, Germany. Its Mars Lumograph line is widely used by artists, designers, architects, and students.
Mars Lumograph vs Mars Lumograph Black
- Mars Lumograph (graphite)
The standard Mars Lumograph glides smoothly while maintaining a crisp edge, which makes it especially useful for structured line work and hatching. In 4B, it feels somewhat firmer and slightly grayer than many Japanese pencils of the same nominal grade. If you want very deep darks, you may prefer adding a 6B rather than expecting 4B alone to do all the work.
Staedtler Mars Lumograph Drawing and Sketching Pencils – Set of 6
Staedtler Mars Lumograph Sketching Set – Set of 8
- Mars Lumograph Black (carbon‑based)
Has little to no graphite shine since it contains more carbon, so it produces deeper, matte blacks. It has more “grip” on the paper and doesn’t glide as smoothly as standard graphite, but it’s very useful for deep shadows and high‑contrast accents. It is also harder to erase.
Good for:
- deep darks
- matte shadows
- dramatic value contrast
- reducing graphite shine
Faber-Castell 9000
Faber‑Castell is one of the oldest and the most recognized pencil makers, with the Castell 9000 line launched by Count Alexander von Faber‑Castell in 1905.
Feels balanced, controlled, and slightly firm. Not always the darkest at a given grade, which makes it forgiving for beginners since it won’t feel soft or messy.
Good for:
- general drawing
- detail work
- fine textures
- long sketching sessions
- controlled value building
Faber-Castell 9000 Pencil Set of 3 – 2B, 4B, 6B
Faber-Castell 9000 Pencil Set of 6 – HB, B, 2B, 4B, 6B and 8B
Tombow Mono J and Tombow Mono 100 (Japan)
Tombow was founded in Japan in 1913 and first built its reputation on pencils before expanding into office and art supplies.
Tombow Mono J
Mono J is Tombow’s more accessible introductory line. It feels smooth, responsive, and sufficiently dark for expressive drawing.
It is a good choice for beginners who want a high-quality pencil without paying for a premium range.
Tombow Mono Professional Drawing Pencil – 4B
Good for:
- beginner practice
- expressive sketching
- general graphite drawing
- affordable daily use
Tombow Mono 100
Mono 100 is Tombow’s higher-end professional pencil line with very high‑density graphite, giving an ultra‑smooth feel on paper. The graphite lays down smoothly and responds well to changes in pressure.
b. Tombow Mono Professional Drawing Pencil – Set of 7 includes 2H, HB, B, 2B, 4B, 6B, plus a Mono Zero eraser.
c. Tombow Mono Professional Drawing Pencils – Set of 12 includes 6B, 5B, 4B, 3B, 2B, B, HB, F, H, 2H, 3H, and 4H, plus an eraser and pencil sharpener
Good for:
- refined graphite drawing
- smooth shading
- controlled value work
- finished studies
Mitsubishi
Mitsubishi Pencil Co. has produced pencils since the early 20th century. Hi-Uni is their premium pencil line known for smoothness and refinement.
Hi‑Uni
Very smooth, with darkness comparable to Tombow. The 4B feels rich and creamy while still maintaining a reasonably controlled point.
Good for:
- refined drawing practice
- polished graphite work
- subtle value transitions
Prismacolor Ebony Pencil
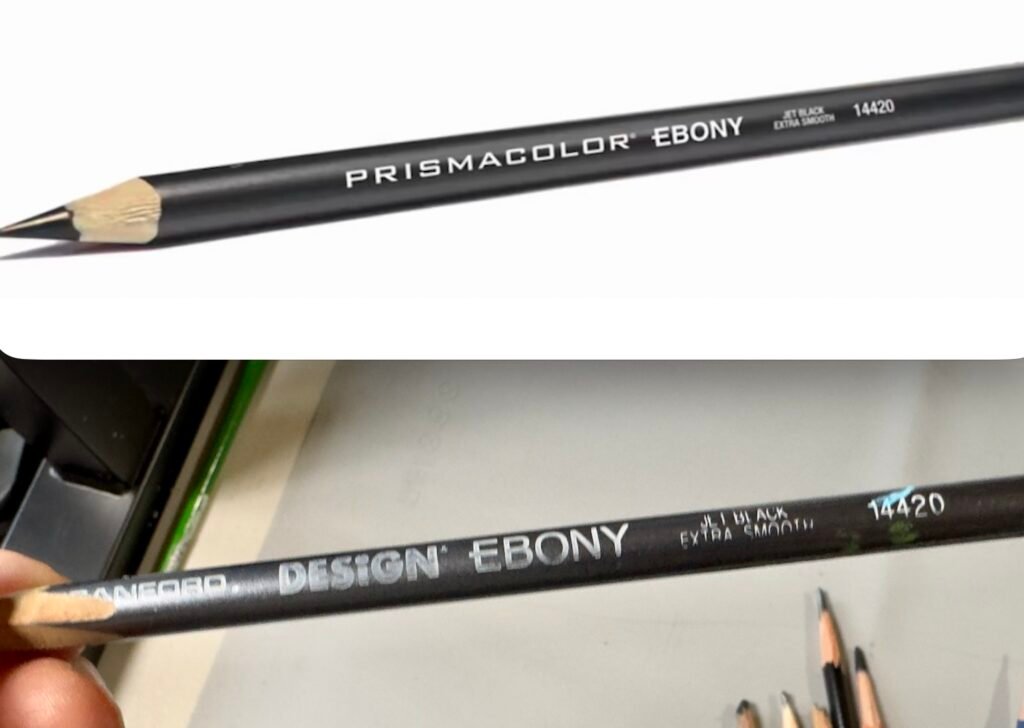
The Prismacolor Ebony pencil does not use a conventional numbered graphite grade. It is generally perceived as a soft, dark pencil—often compared with roughly 4B–6B graphite depending on the paper and the pencil used for comparison.
It is smooth and versatile, especially appealing if you like fast, expressive drawing. It works well as a single pencil for sketching. It’s popular and one of the most reasonably priced pencils.
Prismacolor Ebony Pencil Pack of 12
Good for:
- expressive sketching
- strong dark accents
- bold line quality
- fast value studies
When 6B Still Isn’t Dark Enough: 9B Options
If even 6B or 8B doesn’t give you the depth you want, you can move into 9B territory.
Kimberly 525—9XXB
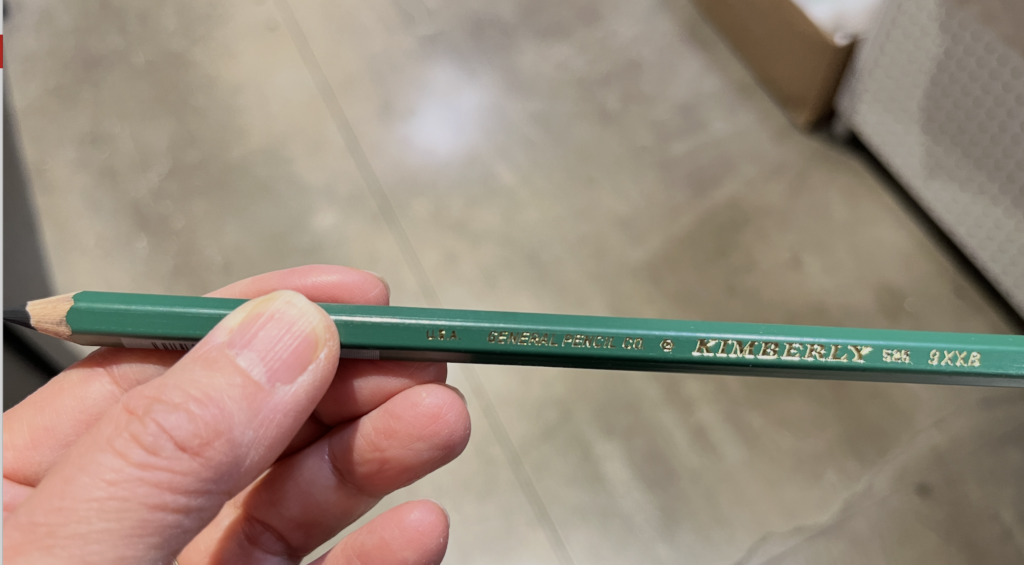
This is a General Pencil Company, USA. “9XXB” indicates an extra‑extra‑soft, very dark graphite pencil. It is much softer and darker than a typical 6B or 8B and allows you to create very dark values while still maintaining more control than charcoal.
Good for:
- deep shadows
- dark accents
- expressive drahas an oversized barrel and a much thicker core.wing
Cretacolor’s MegaGraphite 9B
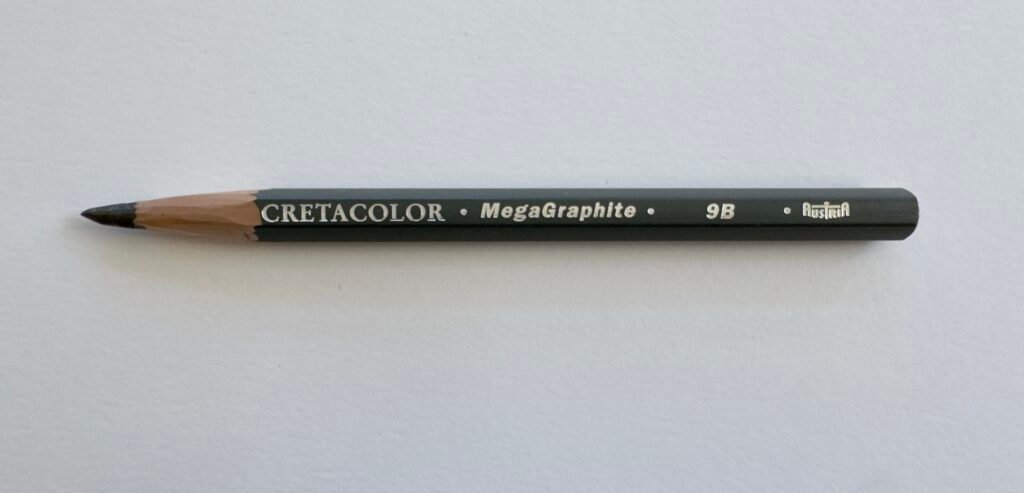
This Austrian brand has an oversized barrel and a much thicker core than a standard wood-cased pencil. It is comfortable for broad shading, side-of-pencil marks, and larger tonal studies. Compared with the regular pencil format of the Kimberly 9XXB, it feels closer to a drawing stick encased in wood.
Both are excellent choices when you need deeper values and bolder marks than a standard 6B or 8B can deliver.
2. Drawing Paper: Type, Size, Weight & Texture
Paper matters far more than beginners often expect. Its surface affects how a pencil moves, how dark your values can become, and how well the sheet holds up to layering and erasing.
Sketchbook vs Drawing Pad
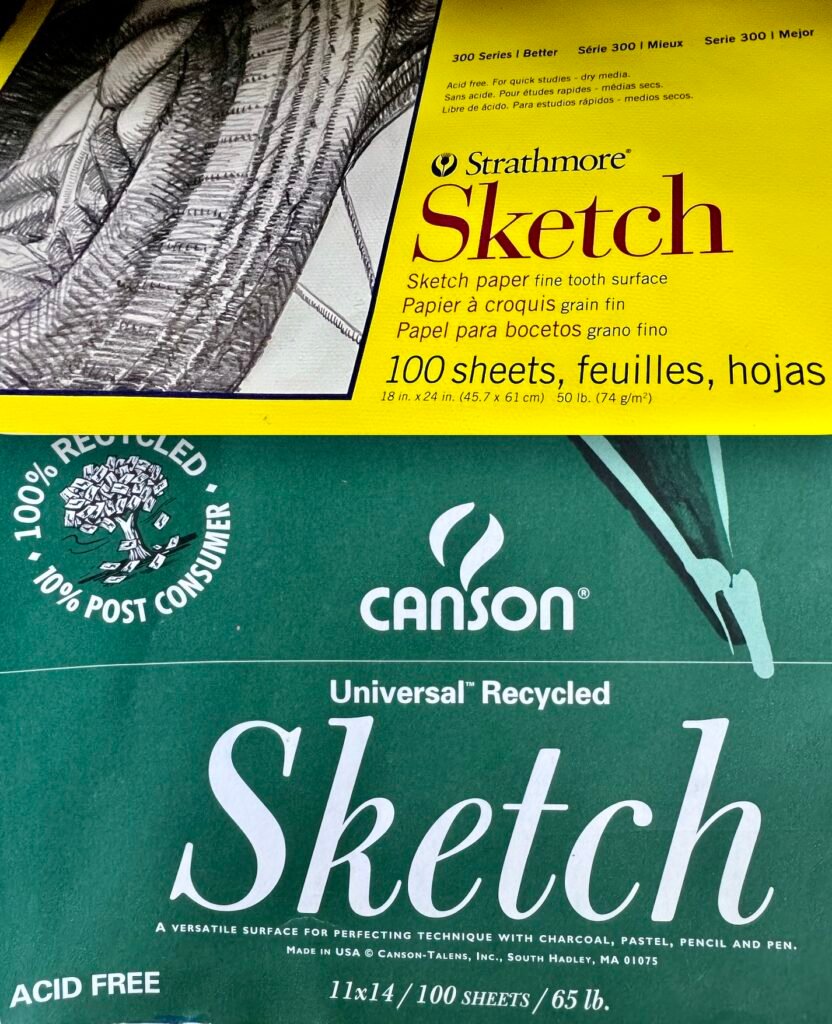
A sketchbook is for practice, exploration, warm-ups, and daily drawing. It should not feel too precious. Many beginners avoid drawing in a beautiful sketchbook because they are afraid of making mistakes, so I recommend using an inexpensive sketchbook freely.
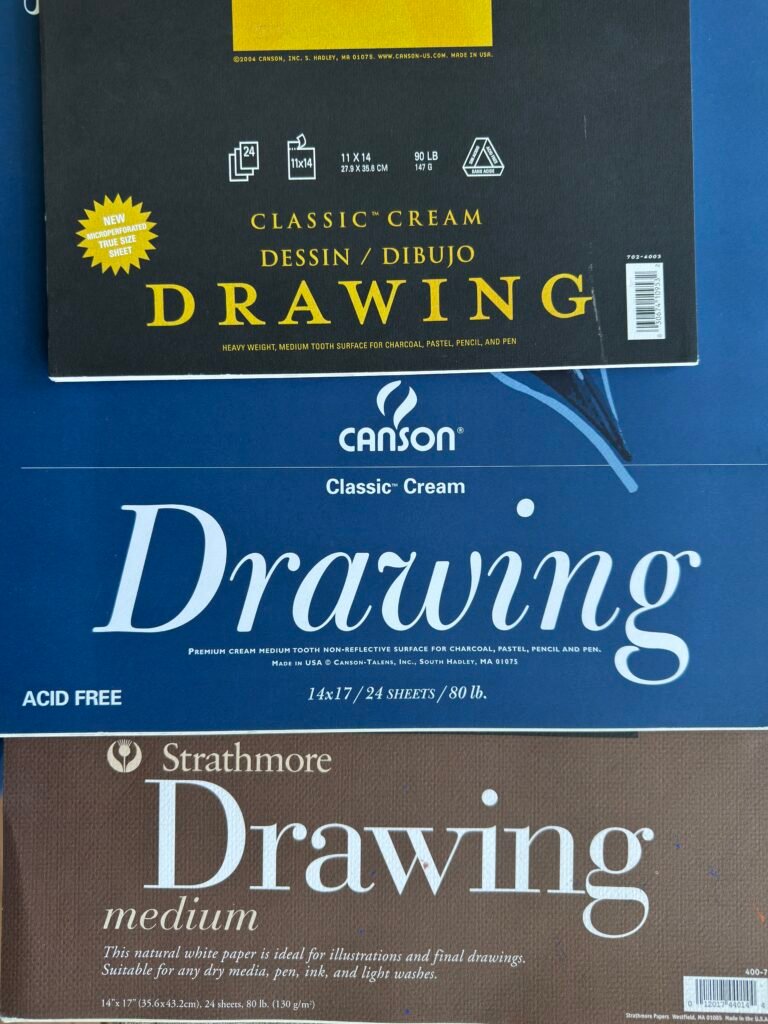
A drawing pad is better for more focused exercises and drawings you may want to keep. Its paper is often heavier and more durable, so it handles repeated shading and erasing more comfortably.
Paper Types at a Glance
| Paper Type | Best For |
| Sketchbook | Daily practice, quick studies, warm-ups, exploration |
| Drawing pad | More focused exercises, repeated erasing, and finished studies |
| Mixed media paper/ Bristol | Combining graphite with ink, light wash, or charcoal |
| Newsprint | Gesture drawing, figure drawing, large, fast practice |
Size: A Practical Starting Point
Paper size is ultimately a personal choice, but 9 × 12 inches is a useful starting point: large enough to develop a drawing, but compact enough to carry and finish.
- Choose one 9 × 12 inch sketchbook (smaller is fine) with an inexpensive medium surface for daily practice.
- Choose one 9 × 12 or 11 × 14 inch drawing pad for more deliberate studies.
If you plan to draw still-life objects, work larger when possible. Drawing close to life size helps you observe proportion, angles, and value relationships more clearly.
If you are more serious than a hobby level, consider adding a large 18 × 24 inch newsprint pad —and when you buy one, choose the rough surface over smooth. Rough newsprint has enough tooth to hold graphite, charcoal, and Conté. It is commonly used in figure-drawing classes because it is economical and encourages large, loose movement.
Weight and Texture
For sketchbooks, lighter paper is perfectly fine because the purpose is frequent practice.
For more finished drawings, choose a sturdier drawing paper that can tolerate repeated erasing and layering. Look at both the listed weight and the manufacturer’s recommended use; paper weight systems vary by category, so an “80 lb” sheet is not automatically the same as 160 gsm.
For a reliable beginner drawing pad, around 100–160 gsm is often a useful starting range, but surface quality and durability matter as much as the number.
For graphite beginners, I recommend a medium-tooth drawing surface: textured enough to hold graphite and allow layering without sliding around.
For even heavier dry-media work—such as charcoal, repeated graphite layering, or mixed-media drawing—choose a Bristol board (paper) or mixed-media pad. Bristol is especially useful for finished drawings because its firm surface stays flat and provides a stable base for detailed work.
Bristol generally comes in two surfaces:
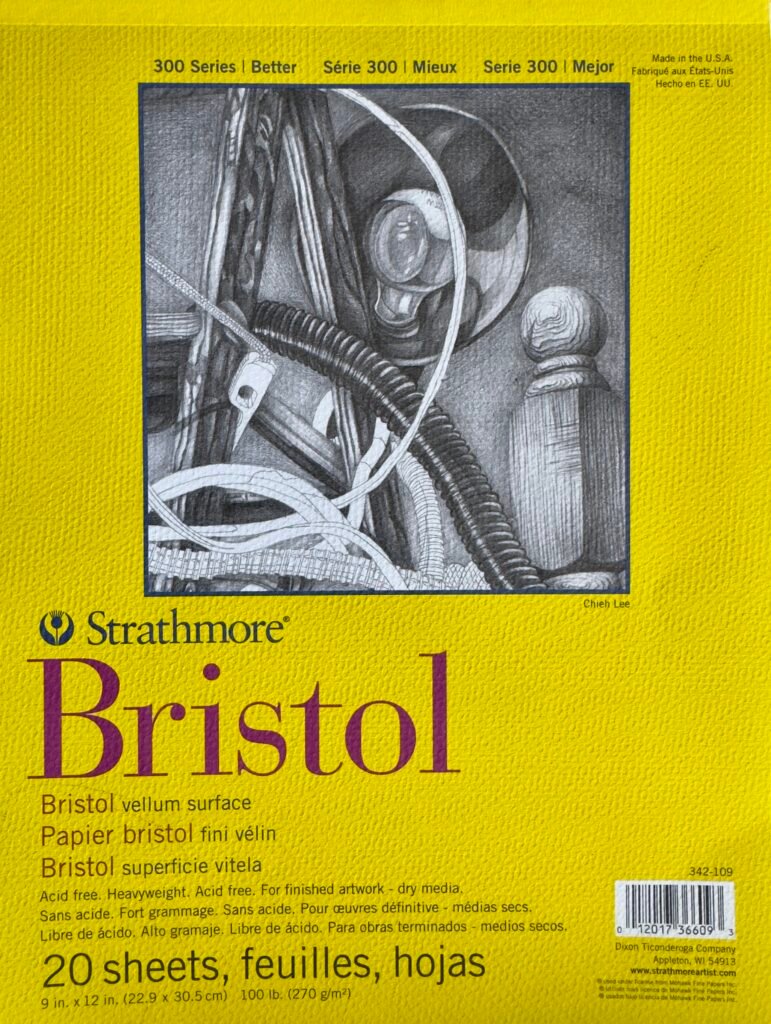
- Smooth Bristol has very little tooth. It works beautifully for crisp line work, technical detail, ink, and clean, even rendering.
- Vellum Bristol has a subtle tooth. It grips graphite more effectively, making it more forgiving for shading, layering, and tonal development.
Because this guide focuses primarily on graphite pencils, I recommend trying Bristol Vellum first.
Bristol can also handle light washes or light wet-media accents, but it is not a replacement for watercolor paper.
Paper Options by Category
These are paper lines I have used over the years, included here as familiar examples of each paper category rather than as a formal ranking. A brief practical buying guide will follow after this. Use them as reference points when comparing paper type, surface, size, and price in your region.
| If you need… | Look for | Common examples |
| A low-pressure sketchbook for daily practice | Sketch paper, roughly 60–90 lb / 90–140 gsm | Canson Universal Hardbound Canson Universal Sketch Strathmore 300 or 400 Series Sketch Fabriano 1264 Sketch |
| A sturdier pad for graphite studies and erasing | Drawing paper, roughly 80 lb / 130 gsm or heavier, medium tooth | Strathmore 400 Series Drawing (9×12″) Strathmore 400 Series (11×14″) Fabriano 1264 Drawing 9×12″ & 11×14″ |
| Paper for graphite plus ink or light wash | Mixed-media paper, preferably sized for wet and dry media | Canson XL Mixed Media Canson Artist Series Mixed Media Art Alternatives Mixed Media Sketchbook |
| A firm surface for detailed graphite work | Bristol board—try Vellum first for graphite | Strathmore 300 & 400 Series Vellum Bristol Canson XL Bristol Vellum Fabriano 1264 Bristol |
| Large, inexpensive sheets for gesture practice | Rough newsprint, ideally 18 × 24 inches | Strathmore 300 Series Rough Newsprint Canson XL Newsprint |
Quick Buying Guide
- Choose Canson XL Sketch or Strathmore 300 Series Sketch, or an equivalent affordable sketchbook when you want lots of paper for daily practice and quick drawings.
- Choose Canson Universal Sketch or Strathmore 400 Series Drawing, or Fabriano 1264 Drawing when you want better resistance to erasing, more texture for graphite, and more finished-looking studies.
- Choose Canson XL Mixed Media or another mixed-media pad if you may add ink or light washes to graphite.
- Choose Vellum Bristol when you specifically want a firm, heavyweight surface for detailed finished drawings, light paintings or mixed media.
3. Erasers & Key Accessories
Erasers are not just for fixing mistakes. In drawing, they are also drawing tools. You can use them to lift highlights, soften edges, clean up areas, and adjust value relationships.
Two Essential Erasers
Kneaded Eraser
- A soft, gray, putty‑like eraser you can knead into any shape. You can mold it into a point to pull tiny highlights out of hair, eyes, or reflective surfaces.
- Gentle on paper fibers and excellent for lifting highlights out of shaded areas without fully erasing
- It is also nice that it does not damage paper fibers the way harder erasers can.
Blick Kneaded Eraser – Medium
Prismacolor Kneaded Eraser – Large
Faber-Castell Kneaded Eraser – Medium
Plastic/Vinyl Eraser
A standard white block eraser (e.g., Tombow Mono, Staedtler Rasoplast) that removes heavier construction lines cleanly.
Faber-Castell Dust-Free Vinyl Eraser
Tombow Mono Natural Eraser – Plastic eraser made of 10% seashells
As you can see in my demo, for erasing very dark layers, I’ve found the Faber‑Castell Dust‑Free particularly effective; many other erasers tend to smear in that situation.
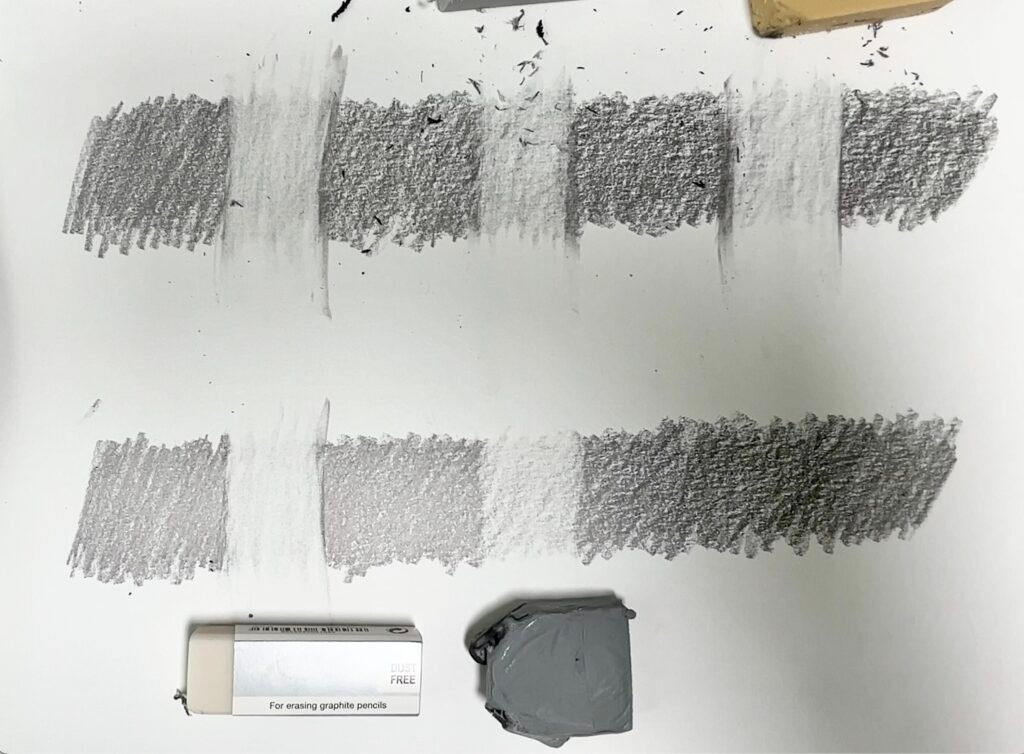
To avoid smudging
Clean the eraser on scrap paper before using it in the drawing, and erase in one direction rather than scrubbing back and forth.
Other Accessories
Sharpener or Blade?
Artists have strong opinions here. A simple, inexpensive snap-off blade is enough to sharpen a pencil and shape the point exactly how you like it — I don’t personally rely on a standard sharpener.
If using a blade feels uncomfortable, try an artist-grade long-point sharpener. It is a convenient alternative for graphite pencils, but softer grades such as 6B and above may break more easily when sharpened to an extremely long point; for these pencils, keep the point slightly shorter and sturdier.
Use whichever method suits you. (For a full walkthrough — including why I prefer a blade — see my video Sharpen Like a Pro.)
Blick by KUM Long Point Sharpener
Blending Stumps (Tortillons)
Tightly rolled paper sticks used to blend graphite smoothly. I don’t use them for pencil drawing myself, but some artists love the effect—worth picking up one or two blending stumps if that’s your style.
Art Alternatives Blending Stumps
Ruler
A ruler is useful for measurement, borders, perspective exercises, and checking alignments.
Starter recommendation:
- One 12-inch ruler may be sufficient; an 18-inch ruler is more useful if you often work on larger paper.
- Optional: a small triangle ruler for perspective work and angles.
Alumicolor Non-Slip Straight Edge Ruler – 18″
Staedtler Mars Professional Measuring Set
Viewfinder
A viewfinder helps you isolate your subject, decide what to include in the frame, and simplify shapes and relationships. You can easily make one from sturdy paper (see my earlier demo).
If buying one, I’d recommend a model with an adjustable ratio rather than a fixed format.
ViewCatcher – 3 1/2″ x 3 1/2″, Plastic
Or you can use your phone camera as a crop tool.
Drawing Board or Clipboard
A firm drawing surface is very helpful. Options include:
- simple clipboard
- lightweight drawing board
- masonite board
- foam board
Blick Sketch Pad Board – 15″ x 16″
Tabletop Easel A3 Painting Easel
Three Beginner Drawing Kit
The goal here is to help you understand what each tier includes and decide how much you want to invest before you begin.
Tier 1: Bare‑Bones Starter Kit (Under $20)
This kit is for anyone who wants to spend as little as possible while still having reliable tools for serious practice.
What you need:
- 1 4B pencil
- 1 sketchbook
- 1 kneaded eraser
- 1 snap‑off blade
Product examples:
- Tombow Mono 4B—about $2.95 (single pencil)
- Fabriano 1264 Sketch Pad 9″ × 12″, 100 sheets—about $8.00
- Blick kneaded eraser (small)—about $0.62
- Excel snap‑off knife—about $3.44
Estimated total: about $15 before tax and shipping, based on prices checked at the time of publication.
Any single 4B pencil will work. Buying individual pencils online can be inconvenient, so if you have access to a local art-supply or stationery store, it may be easier—and sometimes less expensive—to purchase one there.
Tier 2: Core Essentials for Practice
Tier 2 is the core essential kit for regular practice. This gives you more range.
- 3 pencils ranging from 2H to 6B
- 1 9 × 12 inch sketchbook
- 1 9 × 12 inch (or 11 × 14 inch) drawing pad
- 1 kneaded eraser
- 1 snap‑off blade
Product examples:
Pencils
- Faber-Castell 9000 Pencils – Art Set: 2B, 4B, 6B—about $ 4.50
Sketchbook
- Fabriano 1264 Sketch Pad, 9″ x 12″, Spiral, 100 Sheets—about $ 8.00
Drawing Pad
- Strathmore Heavyweight Drawing Pad – 9″ x 12″, 24 Sheets, 100 lb (163 gsm)—about $ 10.00
- Strathmore Heavyweight Drawing Pad, 11″ x 14″—about $ 13.00
Kneaded Eraser
Blade
- Excel snap‑off knife—about $3.44
- 4 Pack Box Cutter, 9mm Snap-off Utility Knife—about $ 5.99
Your total will vary depending on the drawing-pad size and whether you buy a single blade or a multi-pack. Expect to spend roughly $25–$35 before tax and shipping.
Tier 3: Expanded Essentials
This kit is for beginners who are ready to practice regularly and want tools that support more structured study. Build it gradually—you do not need to purchase every item at the same time.
Any artist-grade 6-pencil set such as Staedtler, Faber-Castell, Tombow, Mitsubishi that covers hard, medium, and soft grades will work.
- 1 set of 6 pencils (covering approximately 2H through 6B)
- 1 sketchbook
- 1 drawing pad
- 1 kneaded eraser
- 1 plastic/vinyl eraser
- 1 blade
- 1 ruler
- 1 viewfinder (store-bought or DIY)
- 1–2 blending stumps
- 1 drawing board or large clipboard
Pencils
- Staedtler Mars Lumograph, Faber-Castell 9000, Tombow Mono, or Mitsubishi Hi-Uni—about $8–$20
Sketchbook
- Fabriano 1264 Sketch Pad, 9″ x 12″, Canson Universal Sketch Pad – 9″ x 12″, Strathmore 400 Series Sketch Pad —about $6-9
Drawing Pad
- Strathmore Heavyweight Drawing Pad – 9″ x 12″, Strathmore Heavyweight Drawing Pad, 11″ x 14″—about $10-13
Erasers
- Kneaded: Faber-Castell Kneaded Eraser , Prismacolor Kneaded Eraser—about $1-2
- Plastic/vinyl eraser: Faber‑Castell Dust‑Free —about $2
Blade
- Excel snap‑off , 4 Pack Box Cutter—about $3-6
Ruler
- Blick Aluminum 18″ , Alumicolor Non-Slip Straight Edge Ruler —about $8
- Staedtler Mars Professional Measuring Set—about $22
- Plastic Clear Ruler Set-4—about $5
Viewfinder
- ViewCatcher or a homemade viewfinder—about $8
Drawing surface
- Blick Sketch Pad Board , —about $13-29
- Tabletop Easel—about $30
Estimated range: approximately $45–$80+ before tax and shipping, depending on the pencil set, drawing surface, and whether you choose a clipboard, drawing board, or tabletop easel.
A clipboard and a homemade viewfinder are enough to begin. Upgrade to a larger drawing board or tabletop easel only if your regular practice makes them useful.
Prefer Amazon? A shorter convenience list of the key materials mentioned in this guide is available in the description of my accompanying YouTube video.
A Quick Recap
You really only need three things to start: a pencil, some paper, and an eraser. Everything beyond that—brand comparisons, paper weights, and viewfinders—helps refine your practice, not gatekeeping it. Pick the tier that matches your budget and commitment level today, and upgrade piece by piece as your practice grows.
If you’re not sure where to begin, Tier 1 is enough to practice every fundamental in this guide. Don’t let the full list talk you out of picking up a pencil.
As this series grows, I’ll share guides to other mediums with a few unconventional drawing tools worth exploring.
Click the image below to watch my YouTube content.